Now that you’ve created a project and downloaded it to your device, we’re ready to record data! Hurrah!
- From the app home screen, click Go To Projects to view your downloaded projects.
- Select the behavior project tile you’d like to record data for.
- Review the project specifications and click New Session.
- Check the boxes for the focal subjects you’ll be observing in that session.
- Optionally, when you are recording social behaviors you can specify the social modifier options available by clicking Adjust Session Settings and then clicking the Specify Social Group button to select the animals in the habitat at the time of the observation session.
- Specify responses for any Session Questions included on your project.
- Click Start Session and then click the Start button.
- Select a focal animal tile at the top of your screen to record data for that individual.
- Select behavior tiles or touch the habitat map to plot animal locations.
- Click Save Session when your session ends and then click Save.
Recording Screen Layout
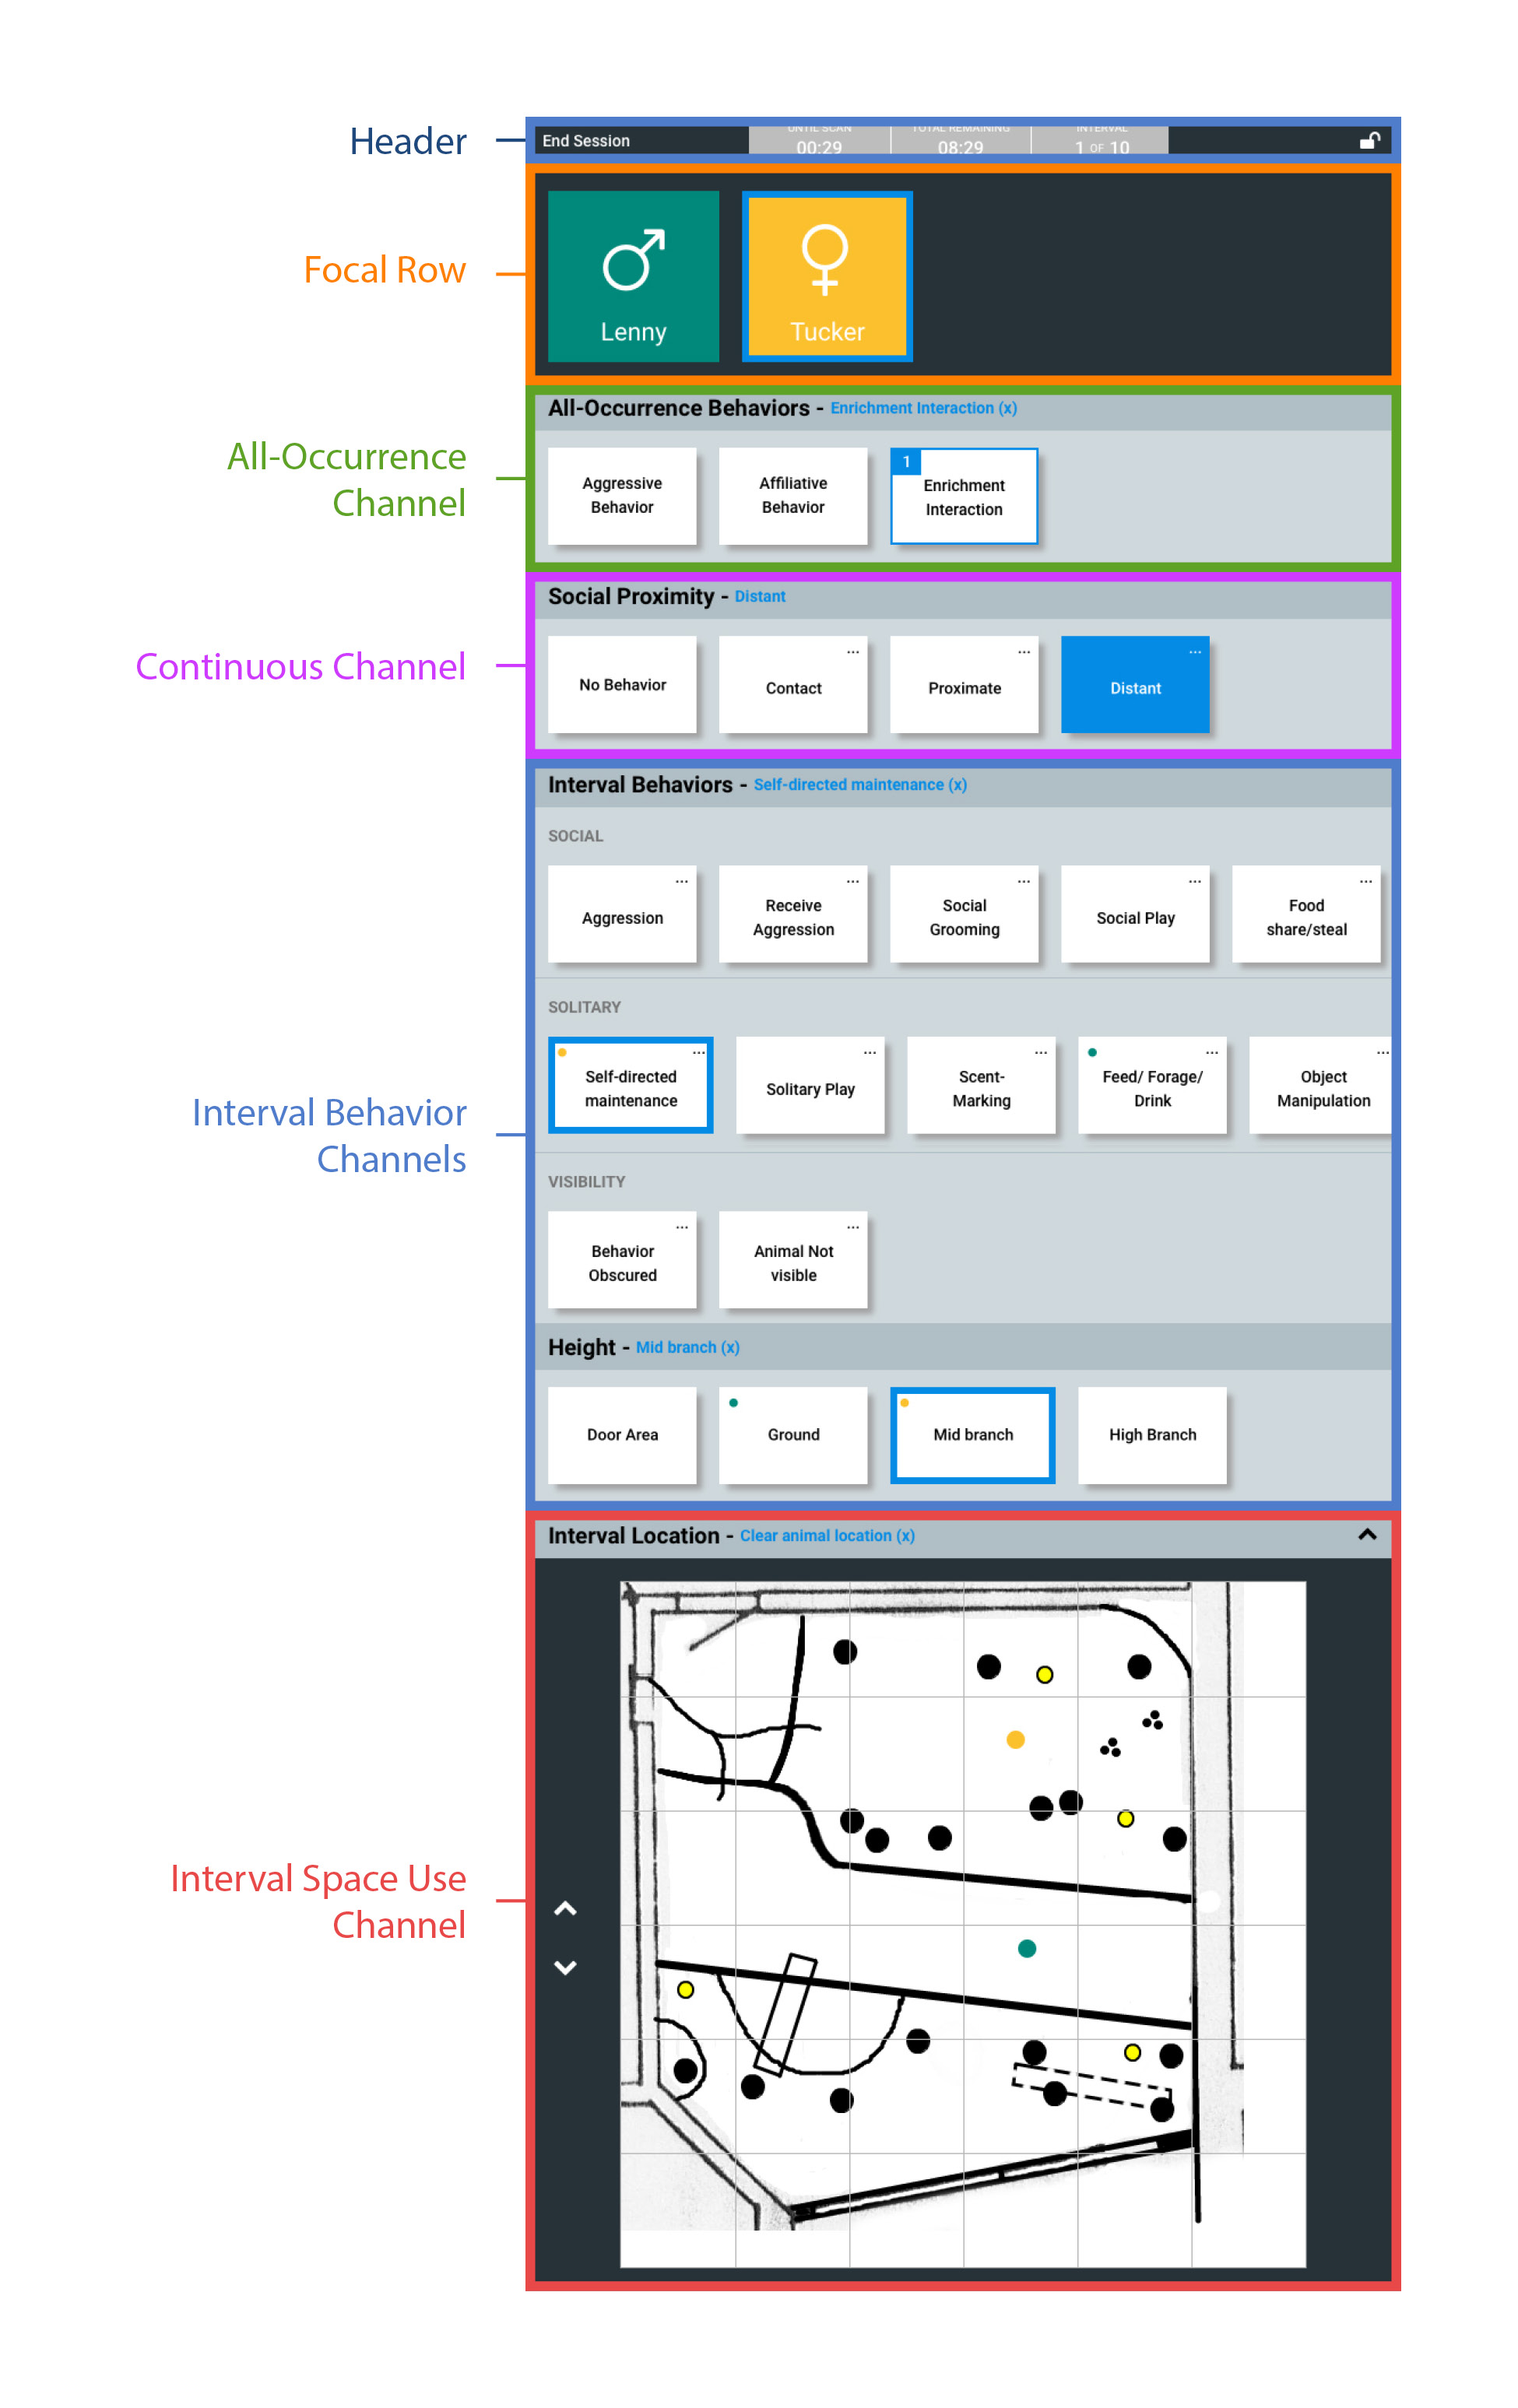
The recording screen is organized into rows for the focal subjects and all channels. Within each row, you can scroll left and right to view all of the tiles. As you add more channels, you’ll see these channels will be stacked visually on your screen require you to scroll up and down to view additional channels.
The order the behavior channels appear in is fixed based on their type: All Occurrences, Continuous, Interval Behavior, Interval Space Use. If you have multiple channels of the same type (e.g., multiple interval behavior channels), can you customize their order of appearance in admin. To do this, go to the Continuous or Interval Channels tab in the project and use the arrow move icon to drag and drop the channels and rearrange their order of appearance in the app.
If you have a lot of behaviors added to a given channel, you may want to consider using sub-groups. Sub-groups allow you to separate the list of behaviors for a channel across multiple rows (sub-groups). The recording rules for the channel still apply though: you can still only select one interval (focal) or continuous behavior choice within the entire channel.
Changing the Recorded Behavior
If you clicked the wrong behavior and need to make a change, you can click the blue text on the Channel Header row to delete the behavior and select a different choice. In the case of interval (focal) data, you can select a different behavior tile until the interval ends. At the end of each interval, the interval behaviors selected are stored and reset to allow you to score behavior for the next interval.
Viewing Animal or Behavior Descriptions
While recording data, you can pull up any descriptions you’ve included for focal animals (text descriptions or pictures) or behaviors (text) by clicking the ellipses in the top right corner of the tile.
Locking the Recording Screen
To prevent accidental screen touches from changing the behaviors you are recording during a session, you can use the lock screen feature. When you click the lock icon in the top right of your screen, the screen will be locked from accidental touches. The screen automatically unlocks at the start of the next interval.