Recording Data
To get started recording data, select Go To Behavioral Observations from the dashboard or Behavioral Observations from the side navigation menu. This will bring you to the Project List page, where each of your projects appears as a separate tile (Note: The projects shown are only the projects that the current Observer signed into the app has been added to when the project was created). Select a project you wish to record an observation for.

The Project List screen displays all of the projects that the current user profile has been added to.
After selecting a project tile, you will see the Project Summary screen. This page displays the animals included in the project, and the specified sampling methods and duration of surveys. In addition, all previously completed observations that have not yet been uploaded will appear here. Click New Session to begin a behavior observation.
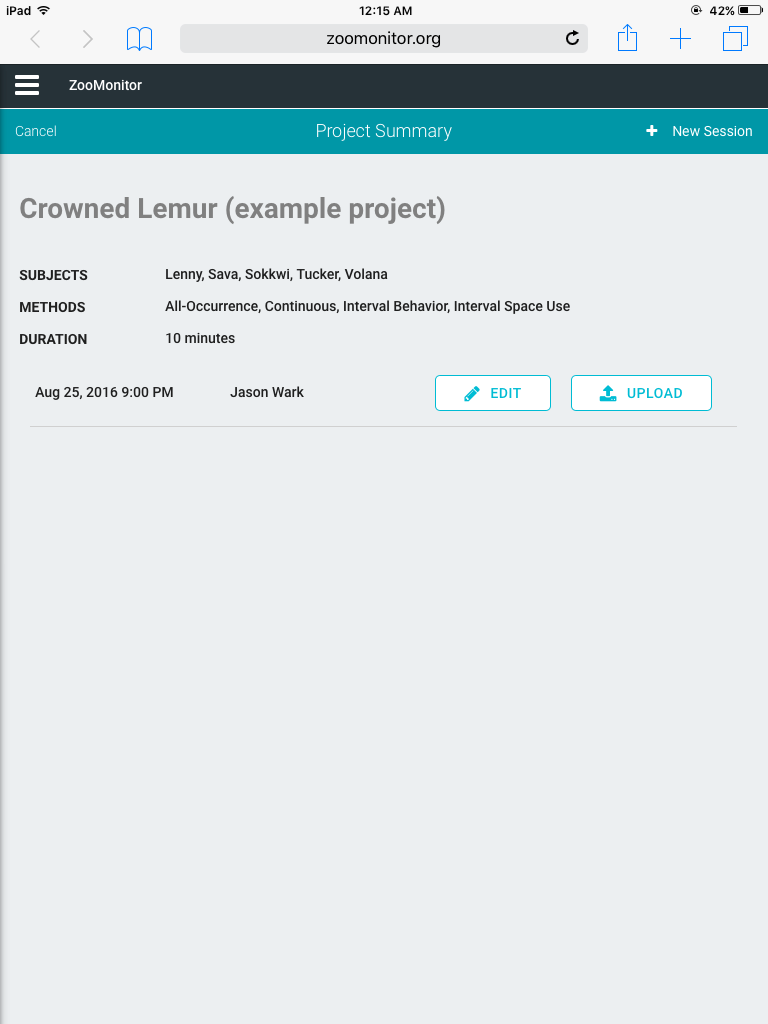
The Project Summary page shows project details and previously recorded surveys.
On the New Session Summary page you can select a focal subject(s) to observe. Also, any Additional Questions created in the project configuration are shown here. You must enter a value for all Additional Questions you’ve created but the Notes field can be left blank. Click Begin Session to go to the observation start screen. Click Start to begin the observation.
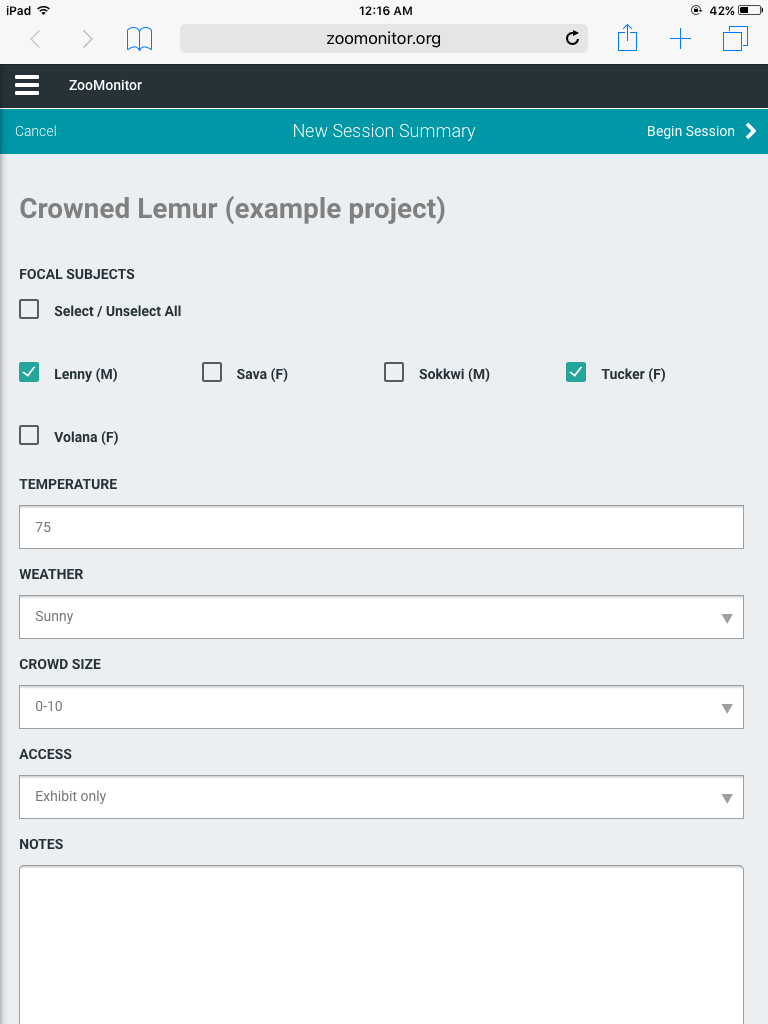
The New Session Summary page allows you to select a focal animal or animals to observe and lists all Additional Questions fields you’ve created for the project.
Data Recording Screen
The Data Recording Screen is vertically organized into separate sections. From top to bottom, the recording screen features a Header and Subject Row and may include an All-Occurrence Channel, Continuous Channel(s), Interval Behavior Channel(s), and an Interval Space Use Channel (Note: Although you can rearrange the order of Continuous and Interval Behavior channels within those sections, the overall order of the channel types on the Data Recording Screen is fixed). To navigate the Data Recording Screen, you can scroll up and down to view all of the channels and you can scroll left and right within channels to view all of the behaviors (Note: You cannot scroll on the map image). Additional details on the sections are provided below.
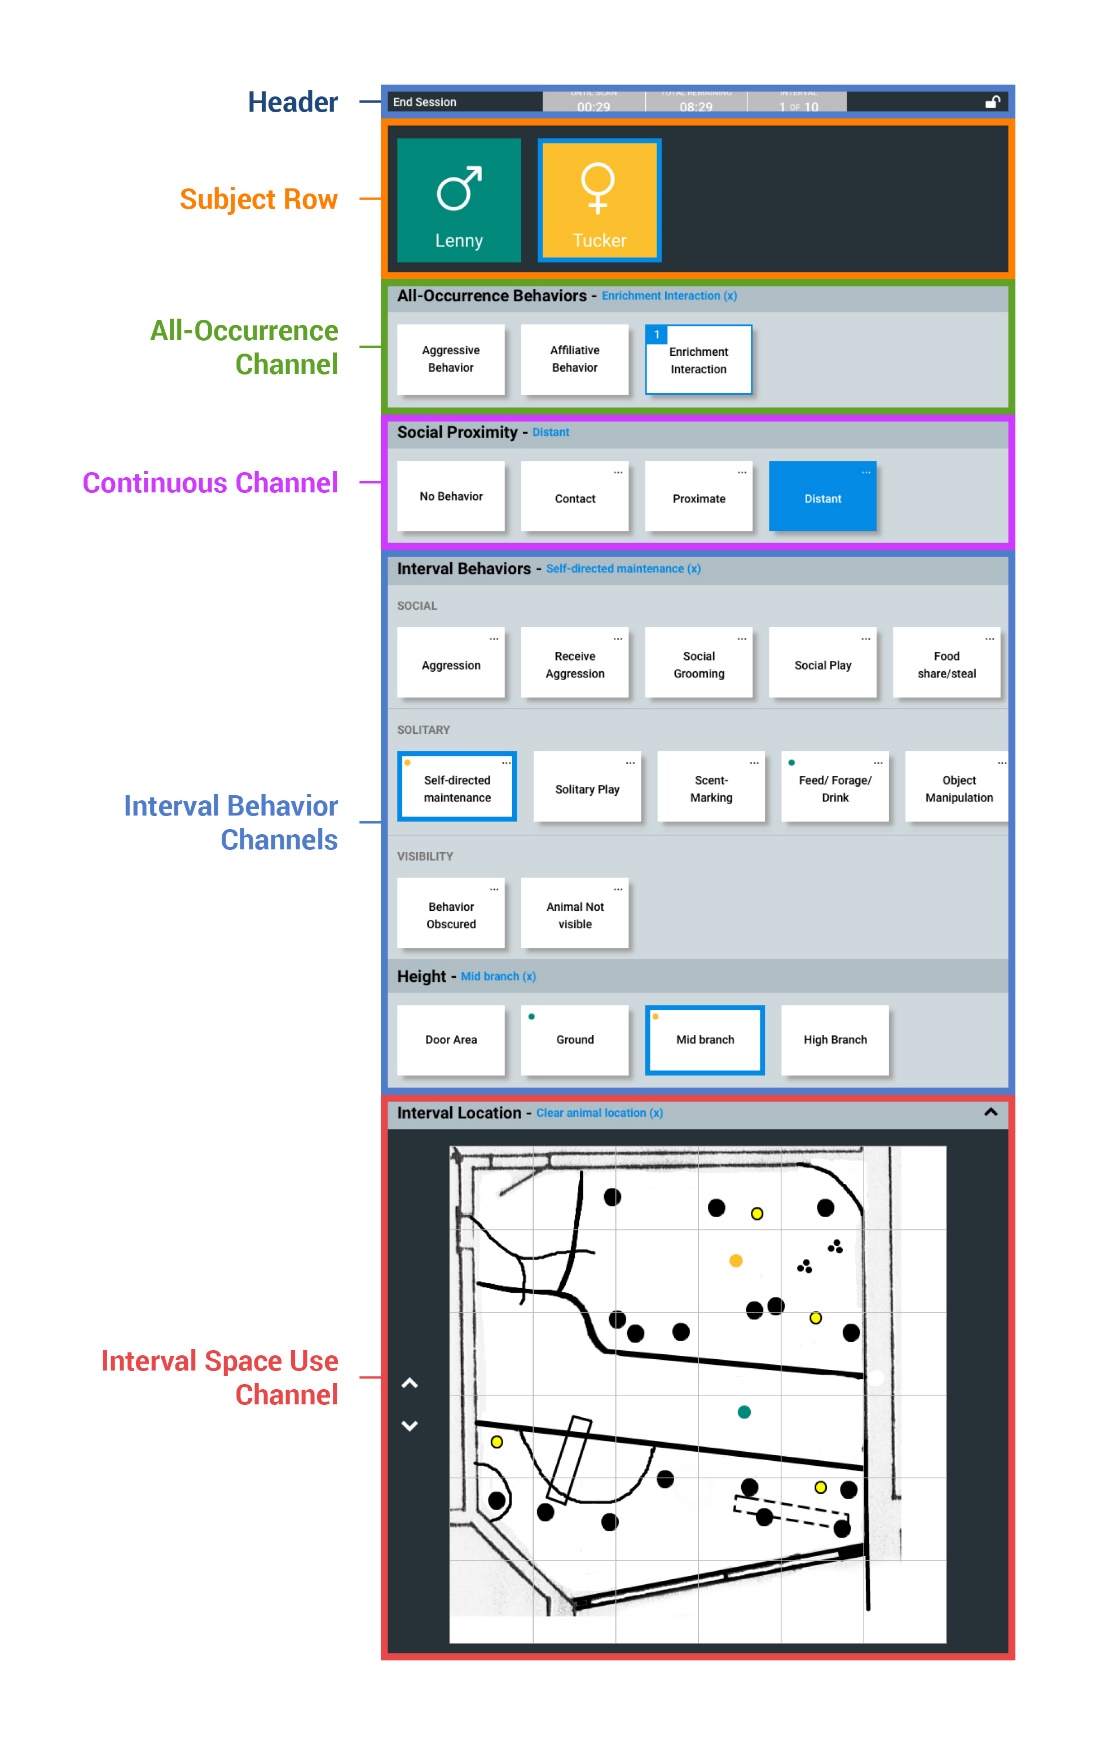
The Data Recording Screen allows you to record the behavior or space use of focal animals.
Header and Subject Row
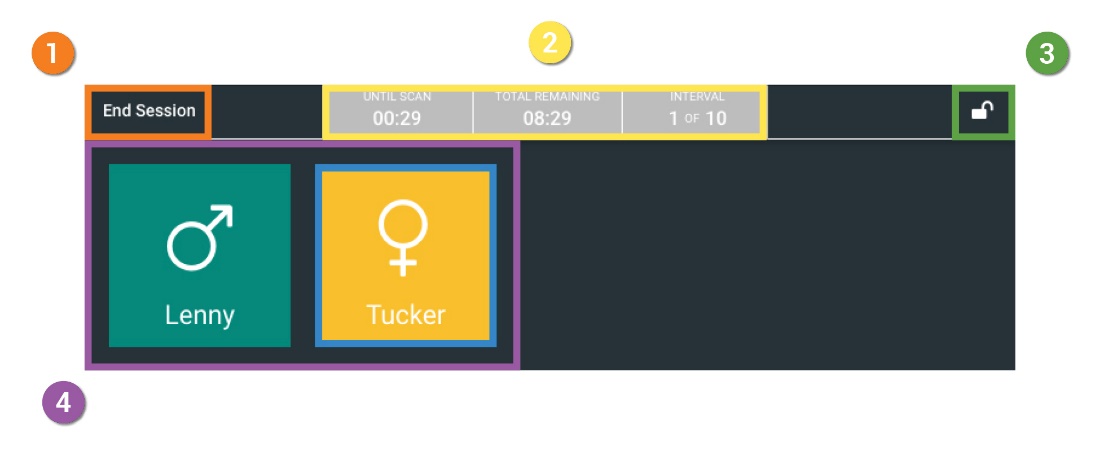
- 1. End Session button - Can be selected at any time to delete or save an observation. After an observation ends, this will turn into the flashing Save Session button.
- 2. Project Timers - Shows the total time remaining in the observation and if the project includes interval channels, the time until the next scan and interval number are also shown.
- 3. Lock button - Can be selected to lock the screen from accidental touches between scans. The screen will automatically unlock at the start of the next interval.
- 4. Focal subject tiles - Displays the name and sex (if specified in Configuration) of the focal animals. You must first select a subject’s tile to record behavior for them (active subject is outlined in blue).
Behavior Channel
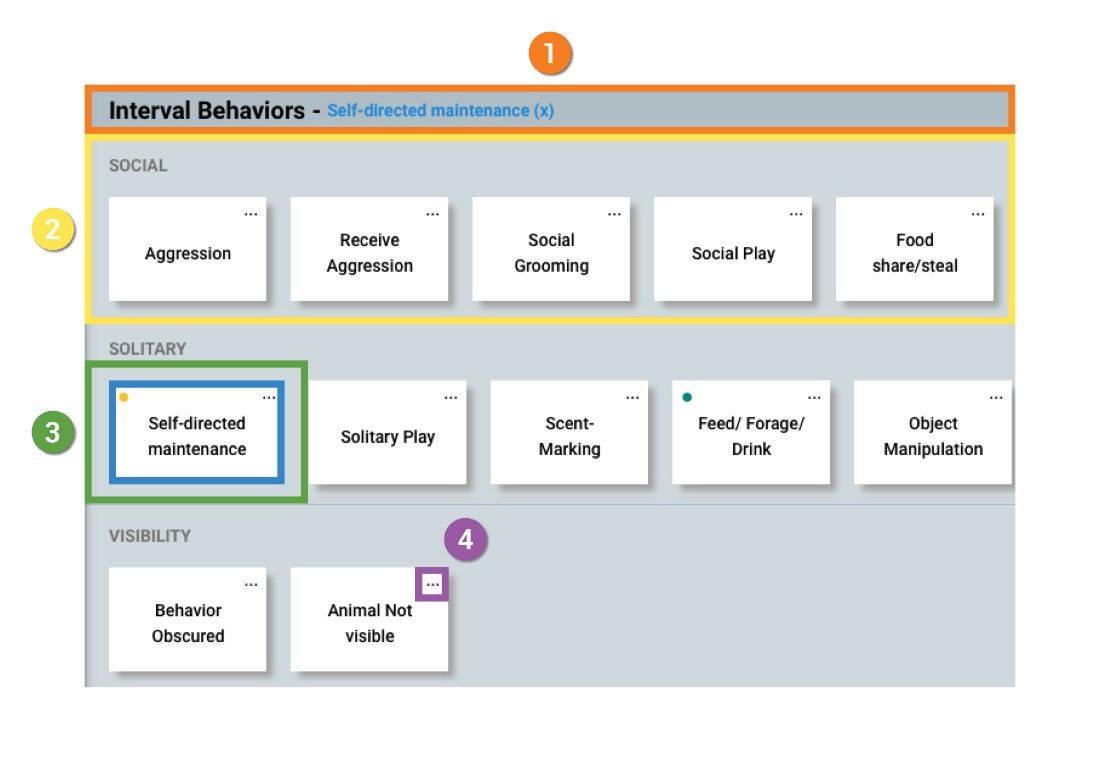
- 1. Channel name - Displays the name of the channel and the last recorded value of the selected focal animal for that channel. To remove the last value, click the name of the value in blue text.
- 2. Sub-group - An optional grouping of the behaviors within the channel.
- 3. Behavior tile - Displays the name of the behavior. When selected, the tile will be outlined in blue and display a colored dot in the top right corner matching the focal animal’s tile.
- 4. More information button - Selecting the ellipses displays the description of the behavior in a pop-up window.
Space Use Channel
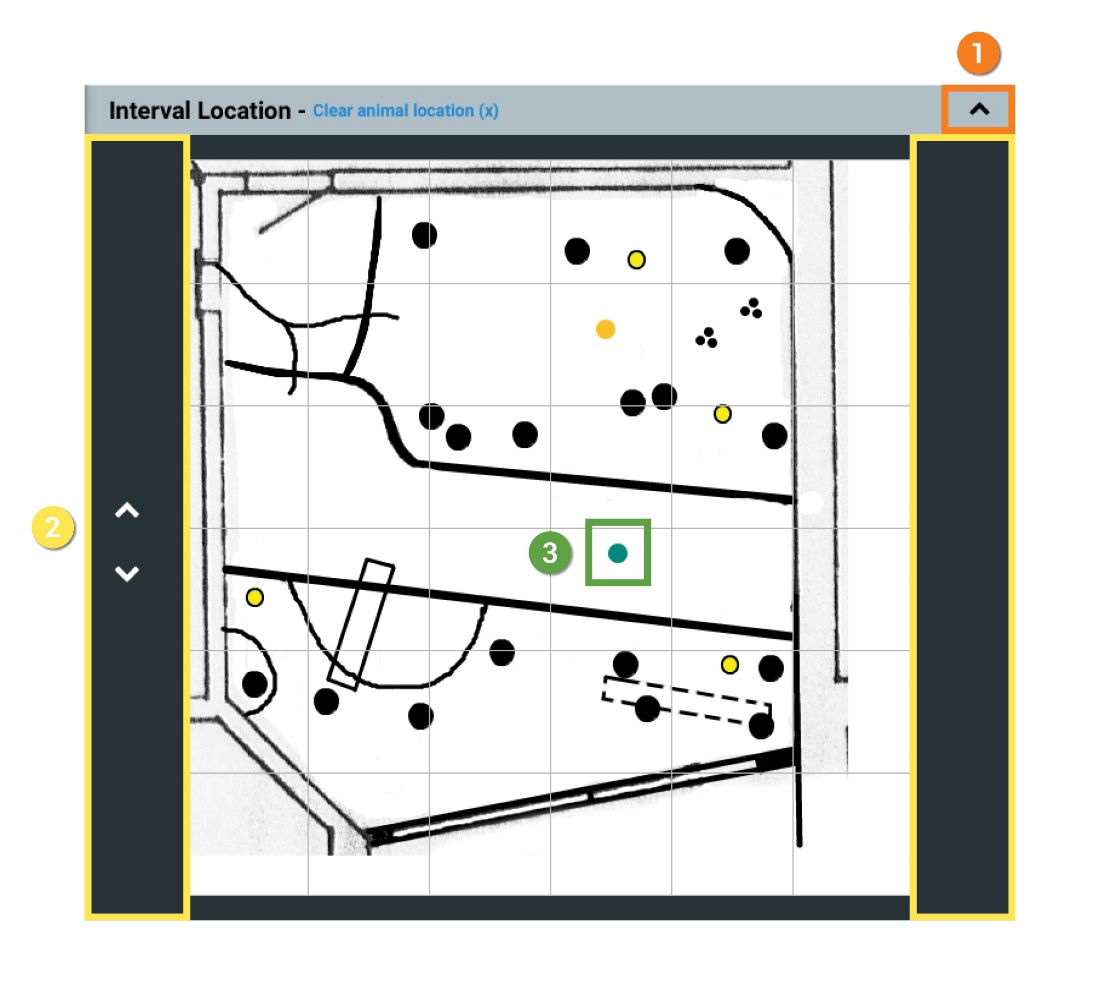
- 1. Back to Top button -Clicking this button returns the user back to the top of the screen.
- 2. Scrollable area on margins -Scrolling in the Space Use channel area is only permitted on these side margins.